I rediscovered my hobby playing the guitar in the last years. It was interesting to see the big changes that happened in the last 20 years in guitar amplification technology. In the 90ies i used to play my guitar with a couple of stompboxes into a huge 100 watt tube head with a 4×12 cabinet. Very loud and heavy stuff. Today there are many new options, especially when you are into computer stuff. So amp modeling on the computer is a thing. This might not be rock solid setups for on stage performance. And sure i like to play my Marshall DSL straight with a Tubescreamer in front and delay pedal in the FX loop. Great sound. But the stuff you can do with amp modeling on the computer is really fantastic.
Bias FX
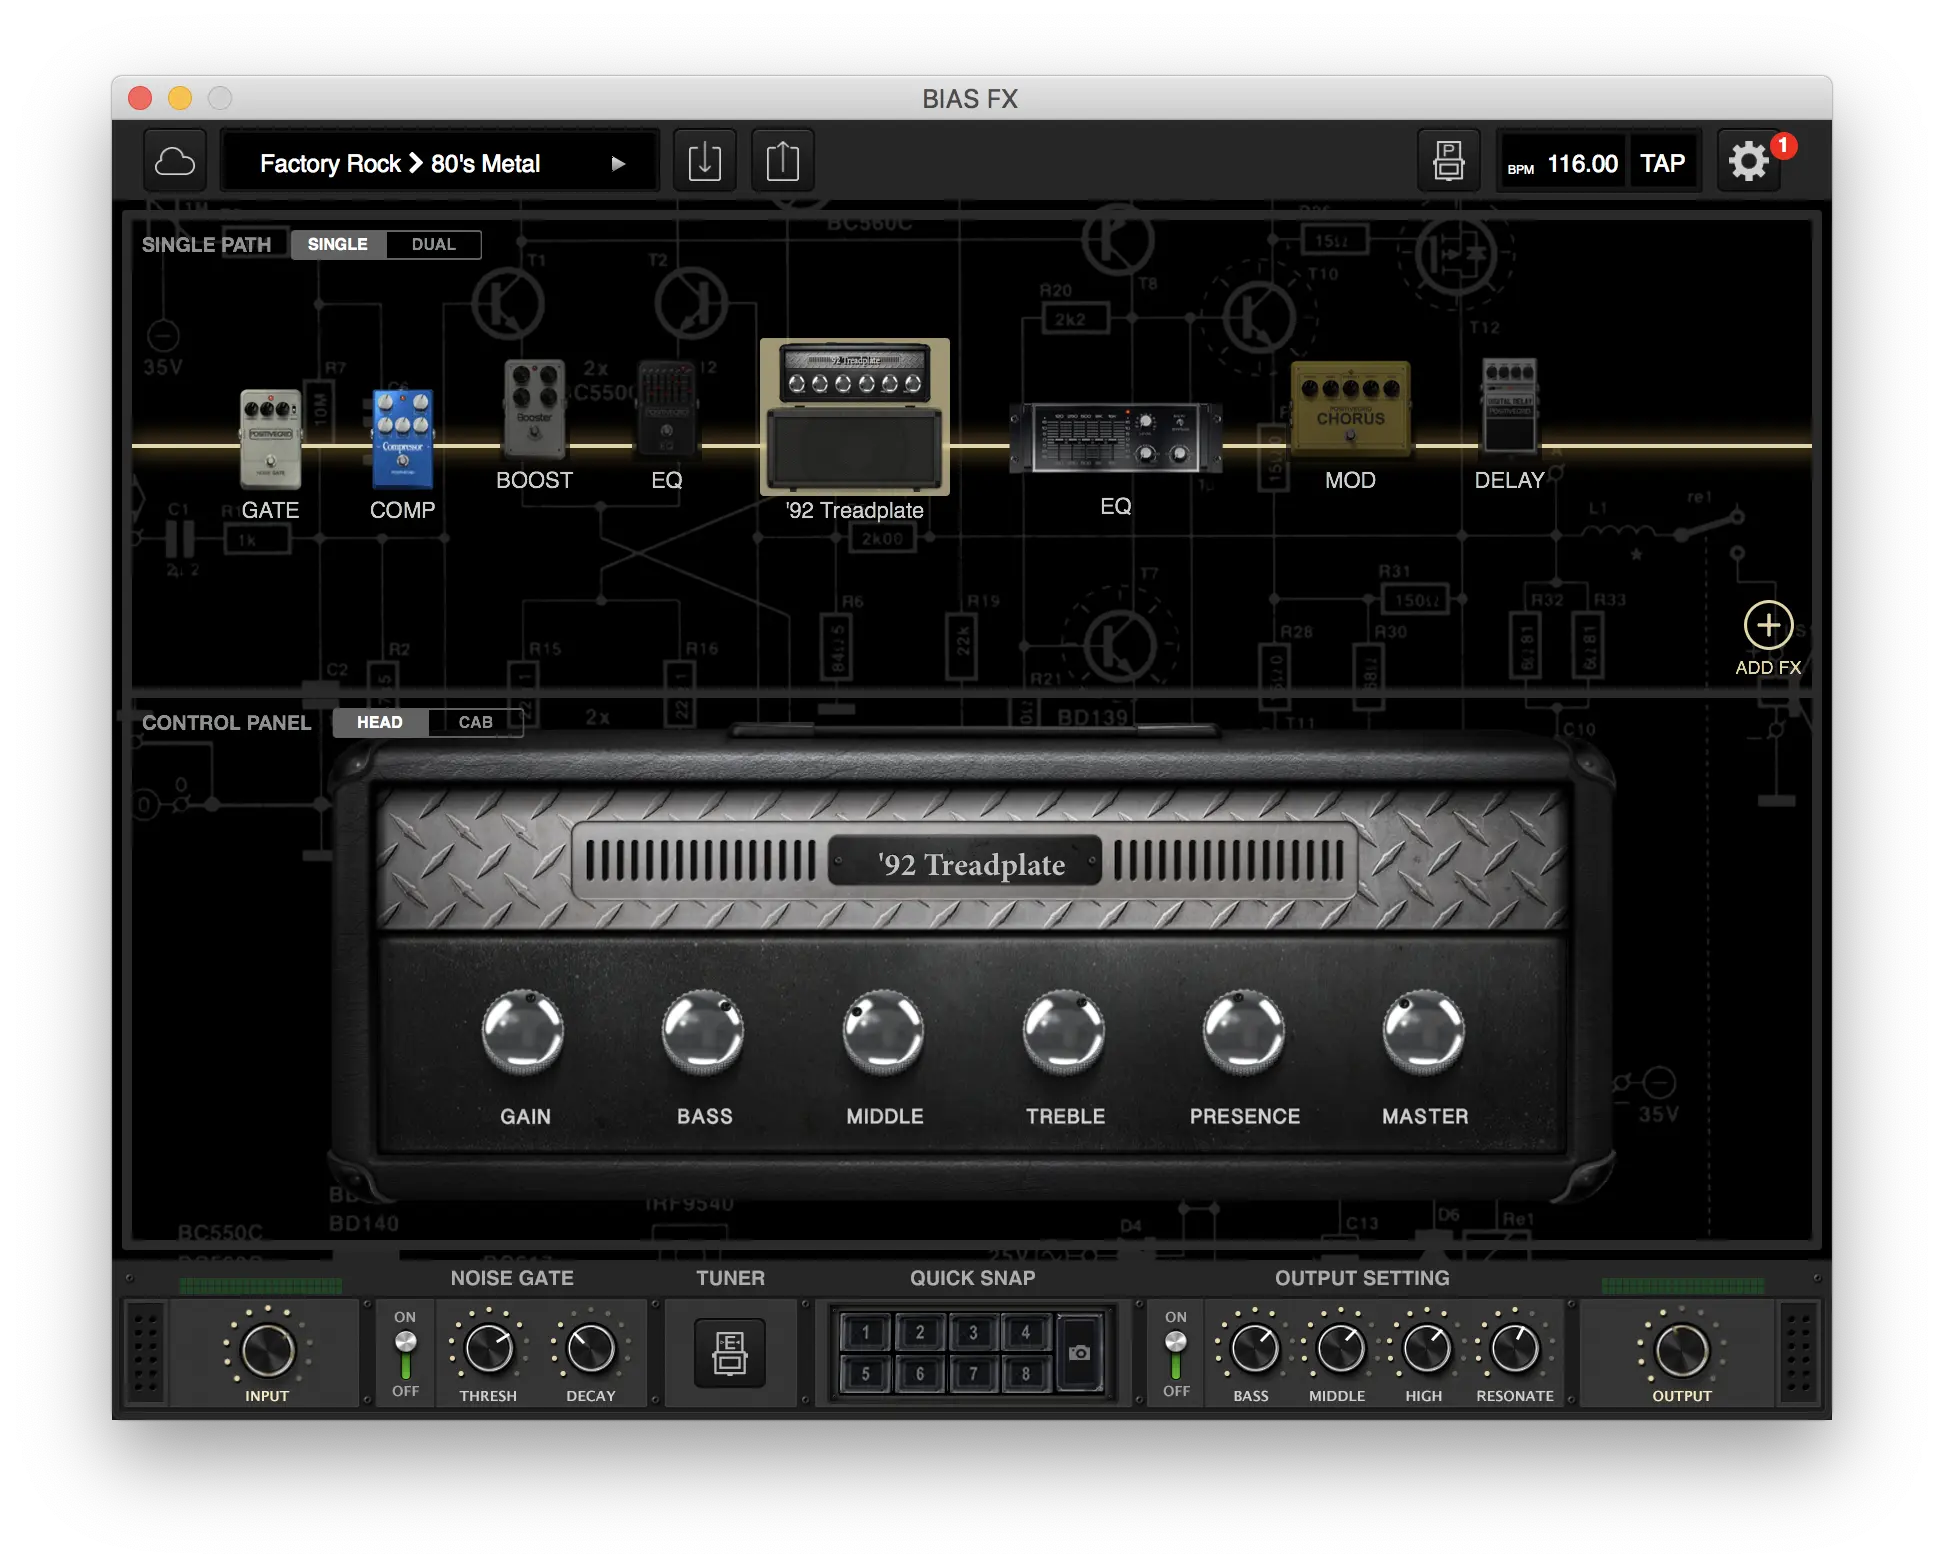
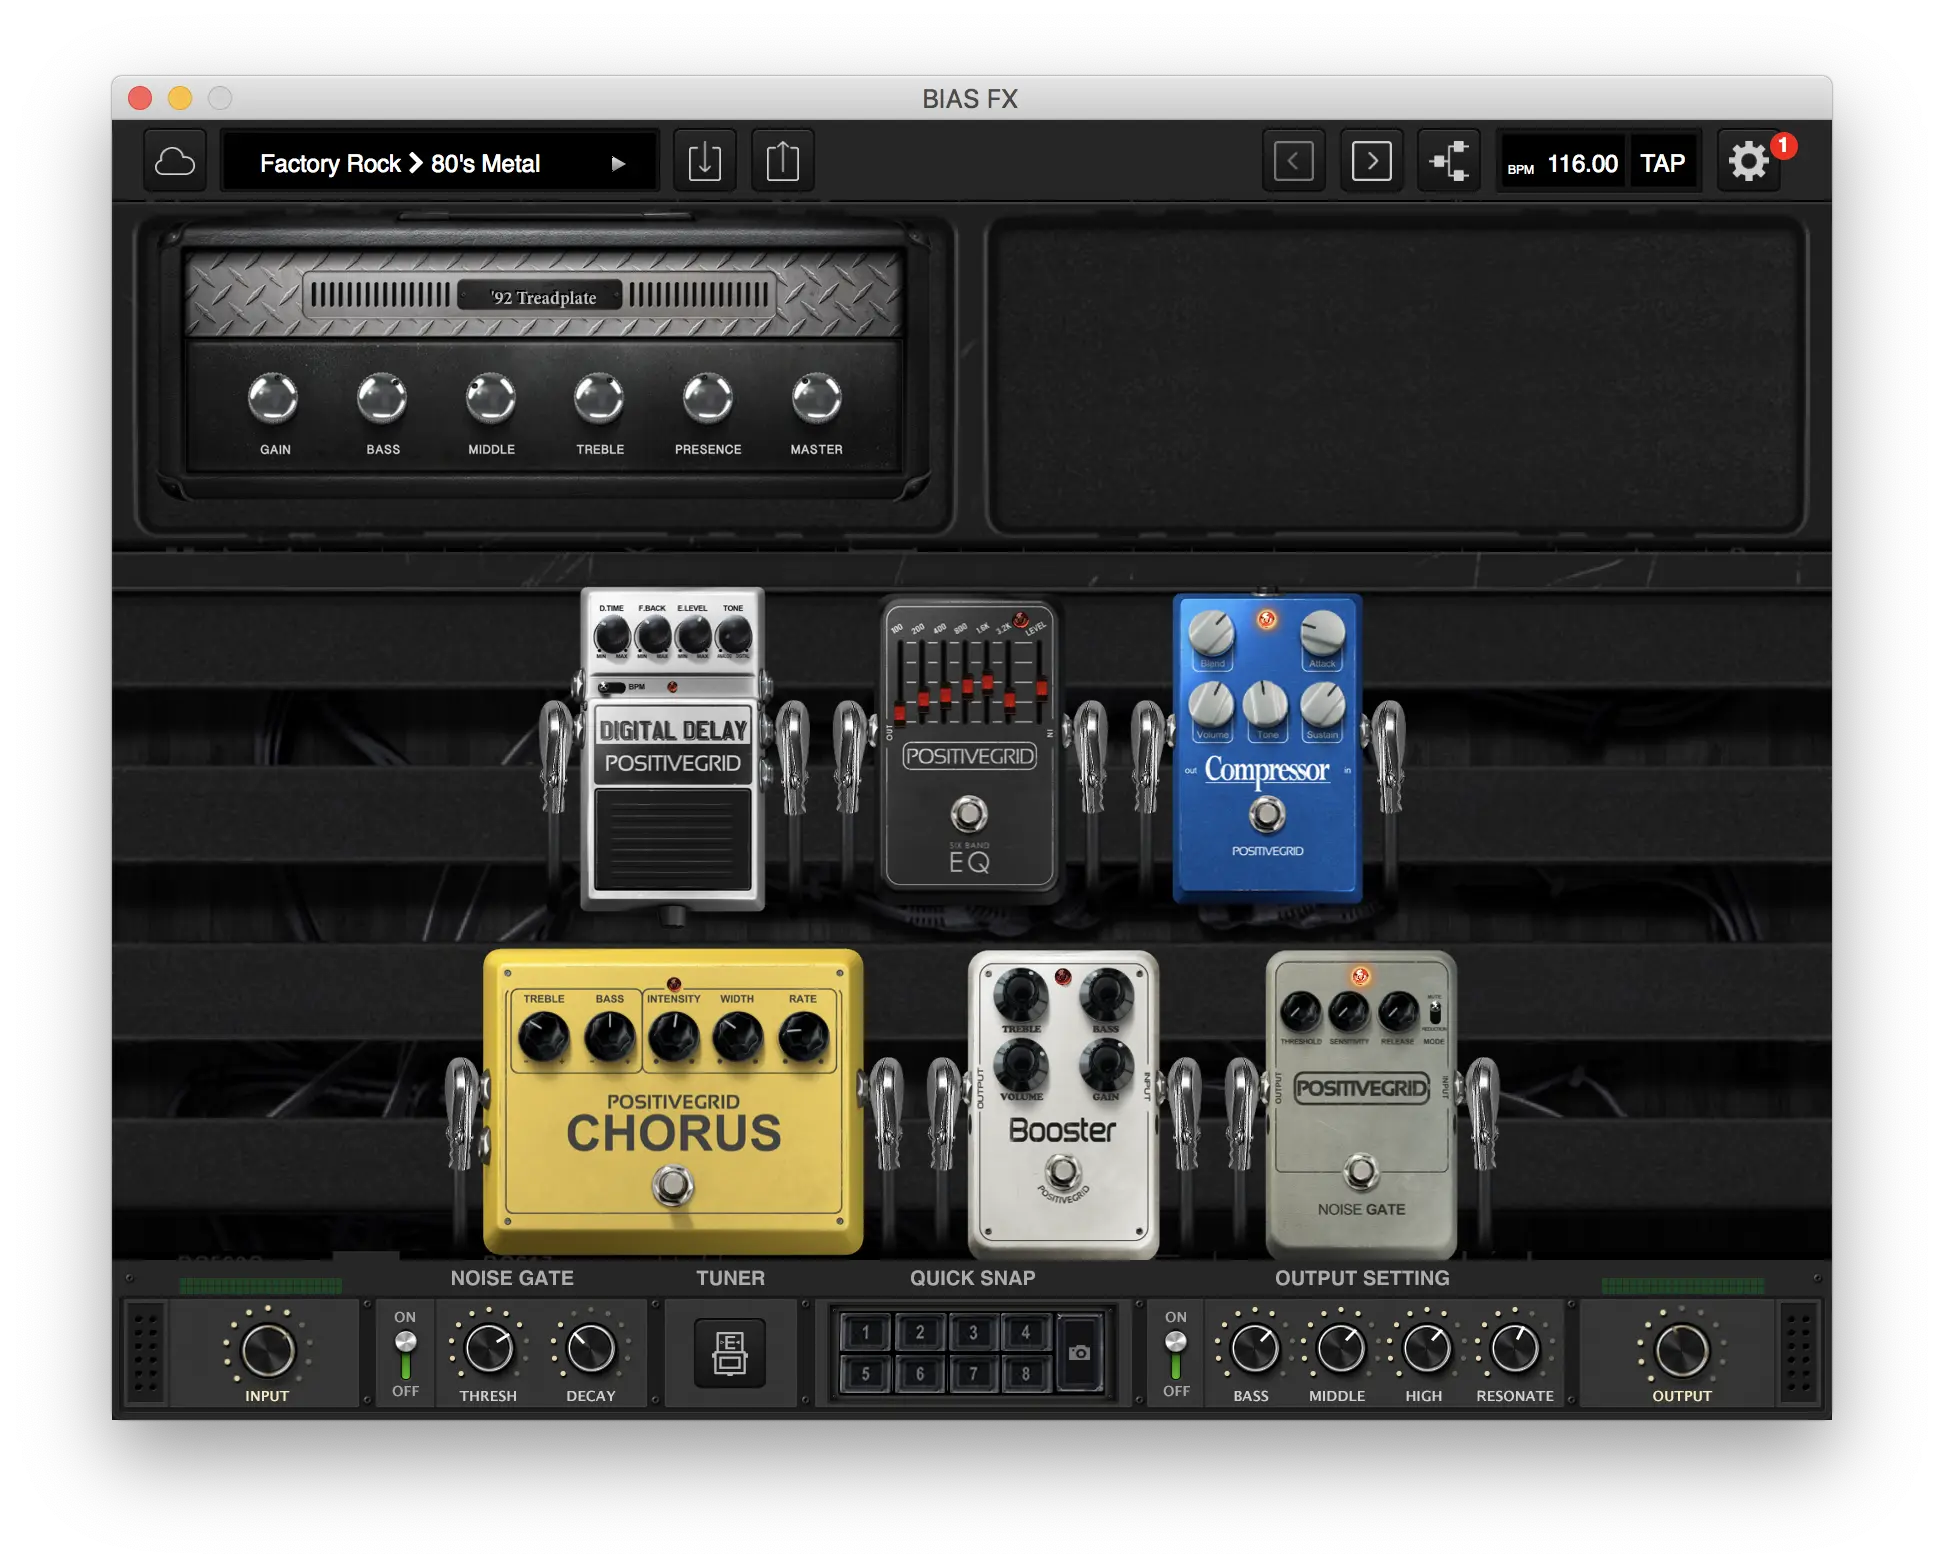
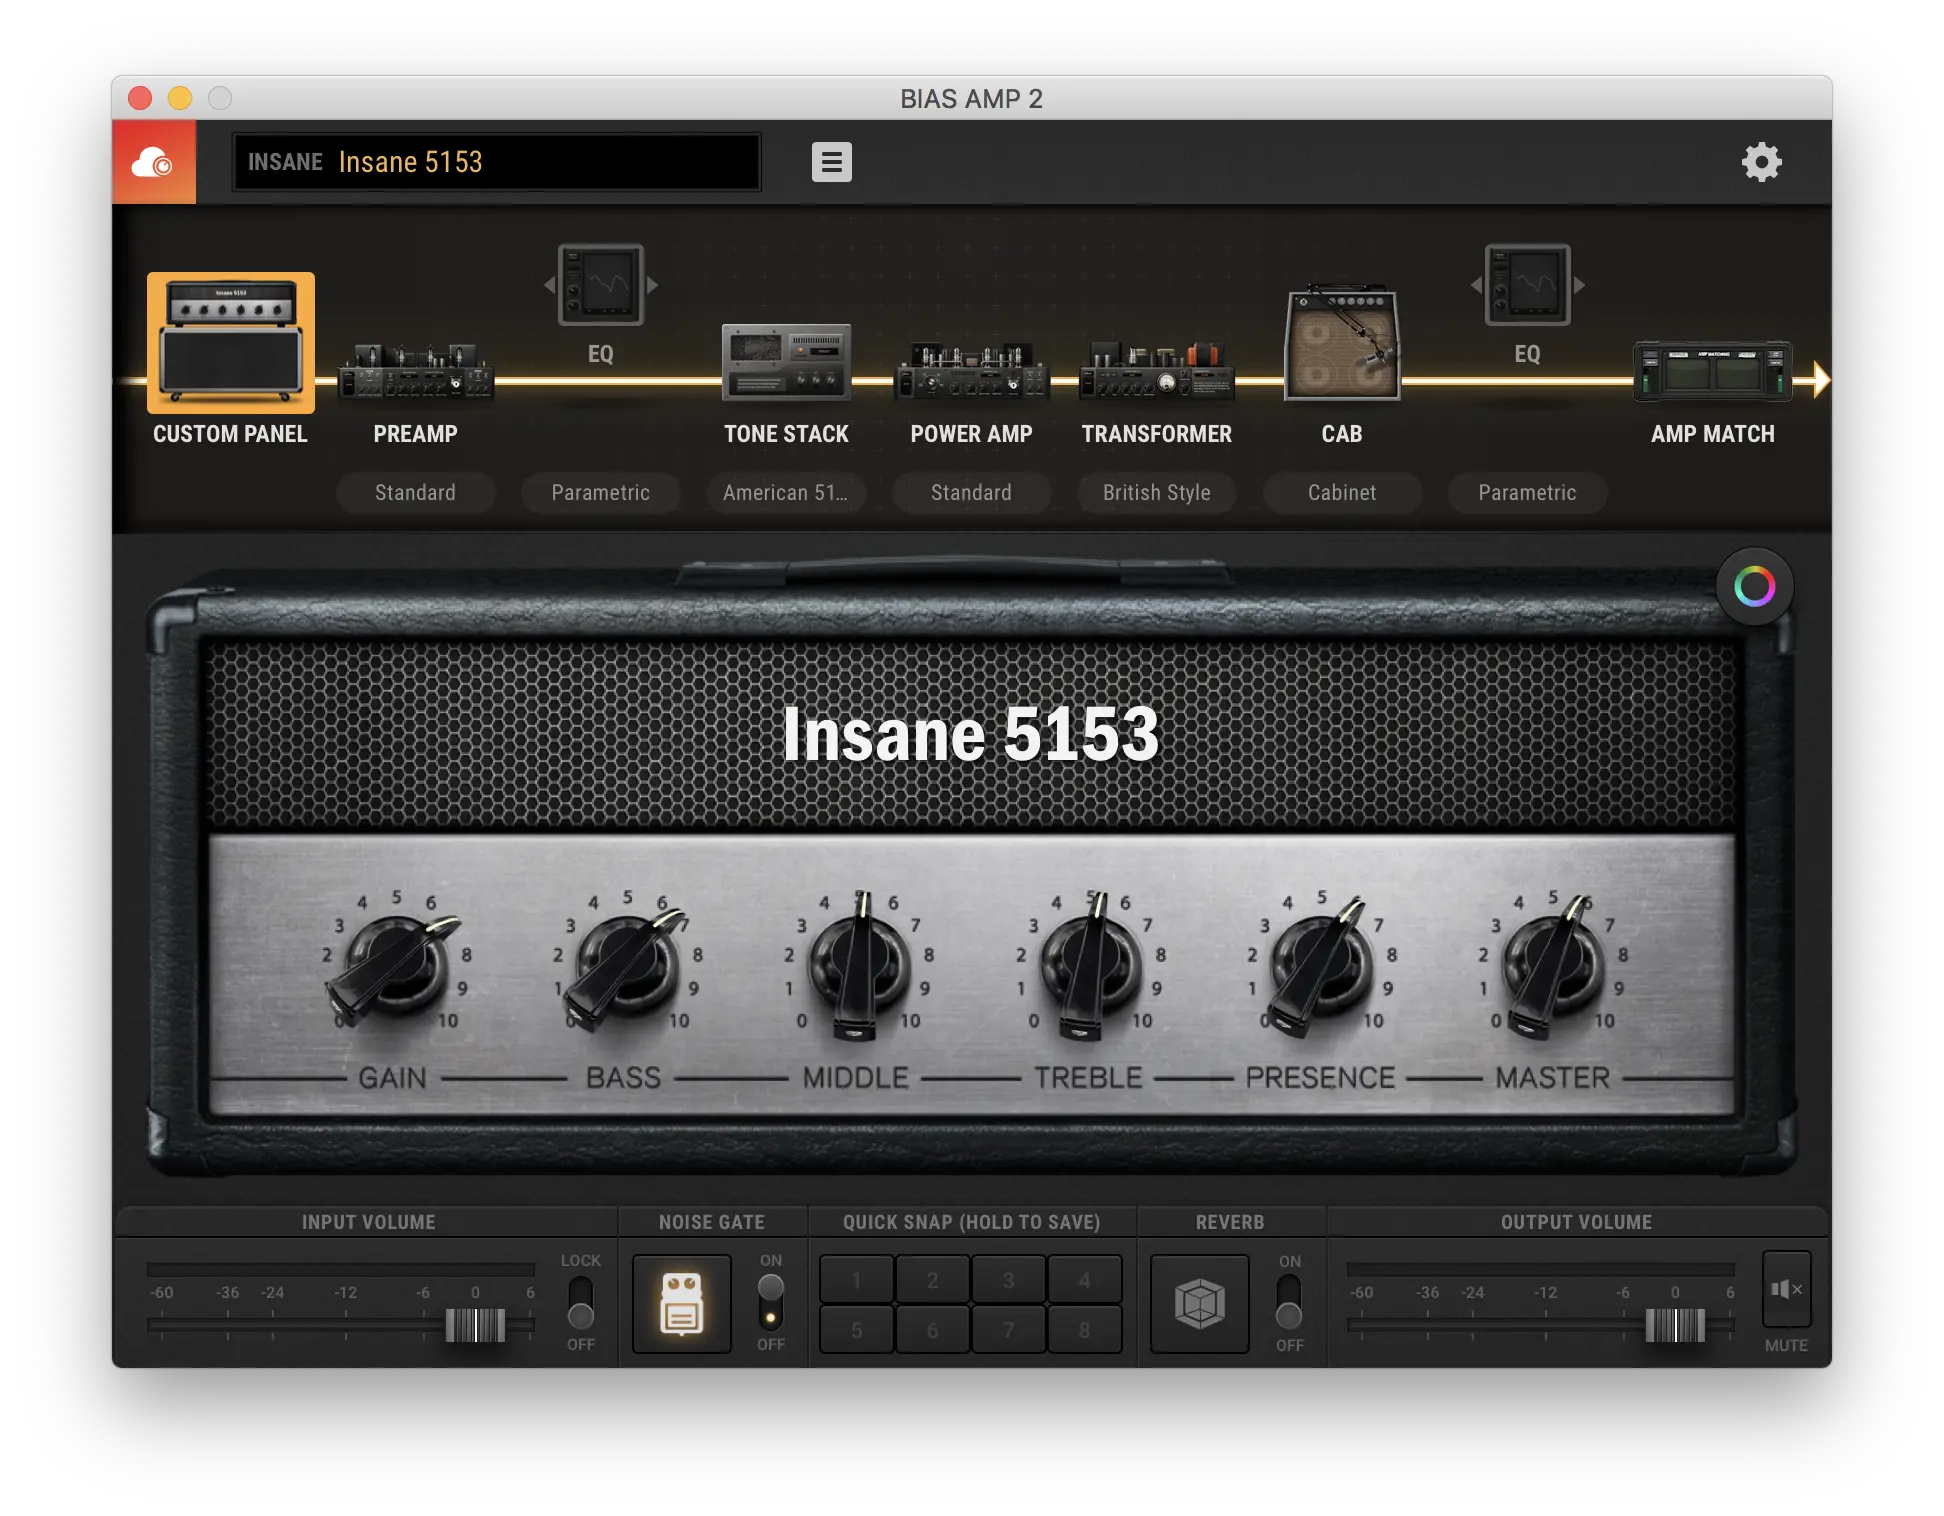
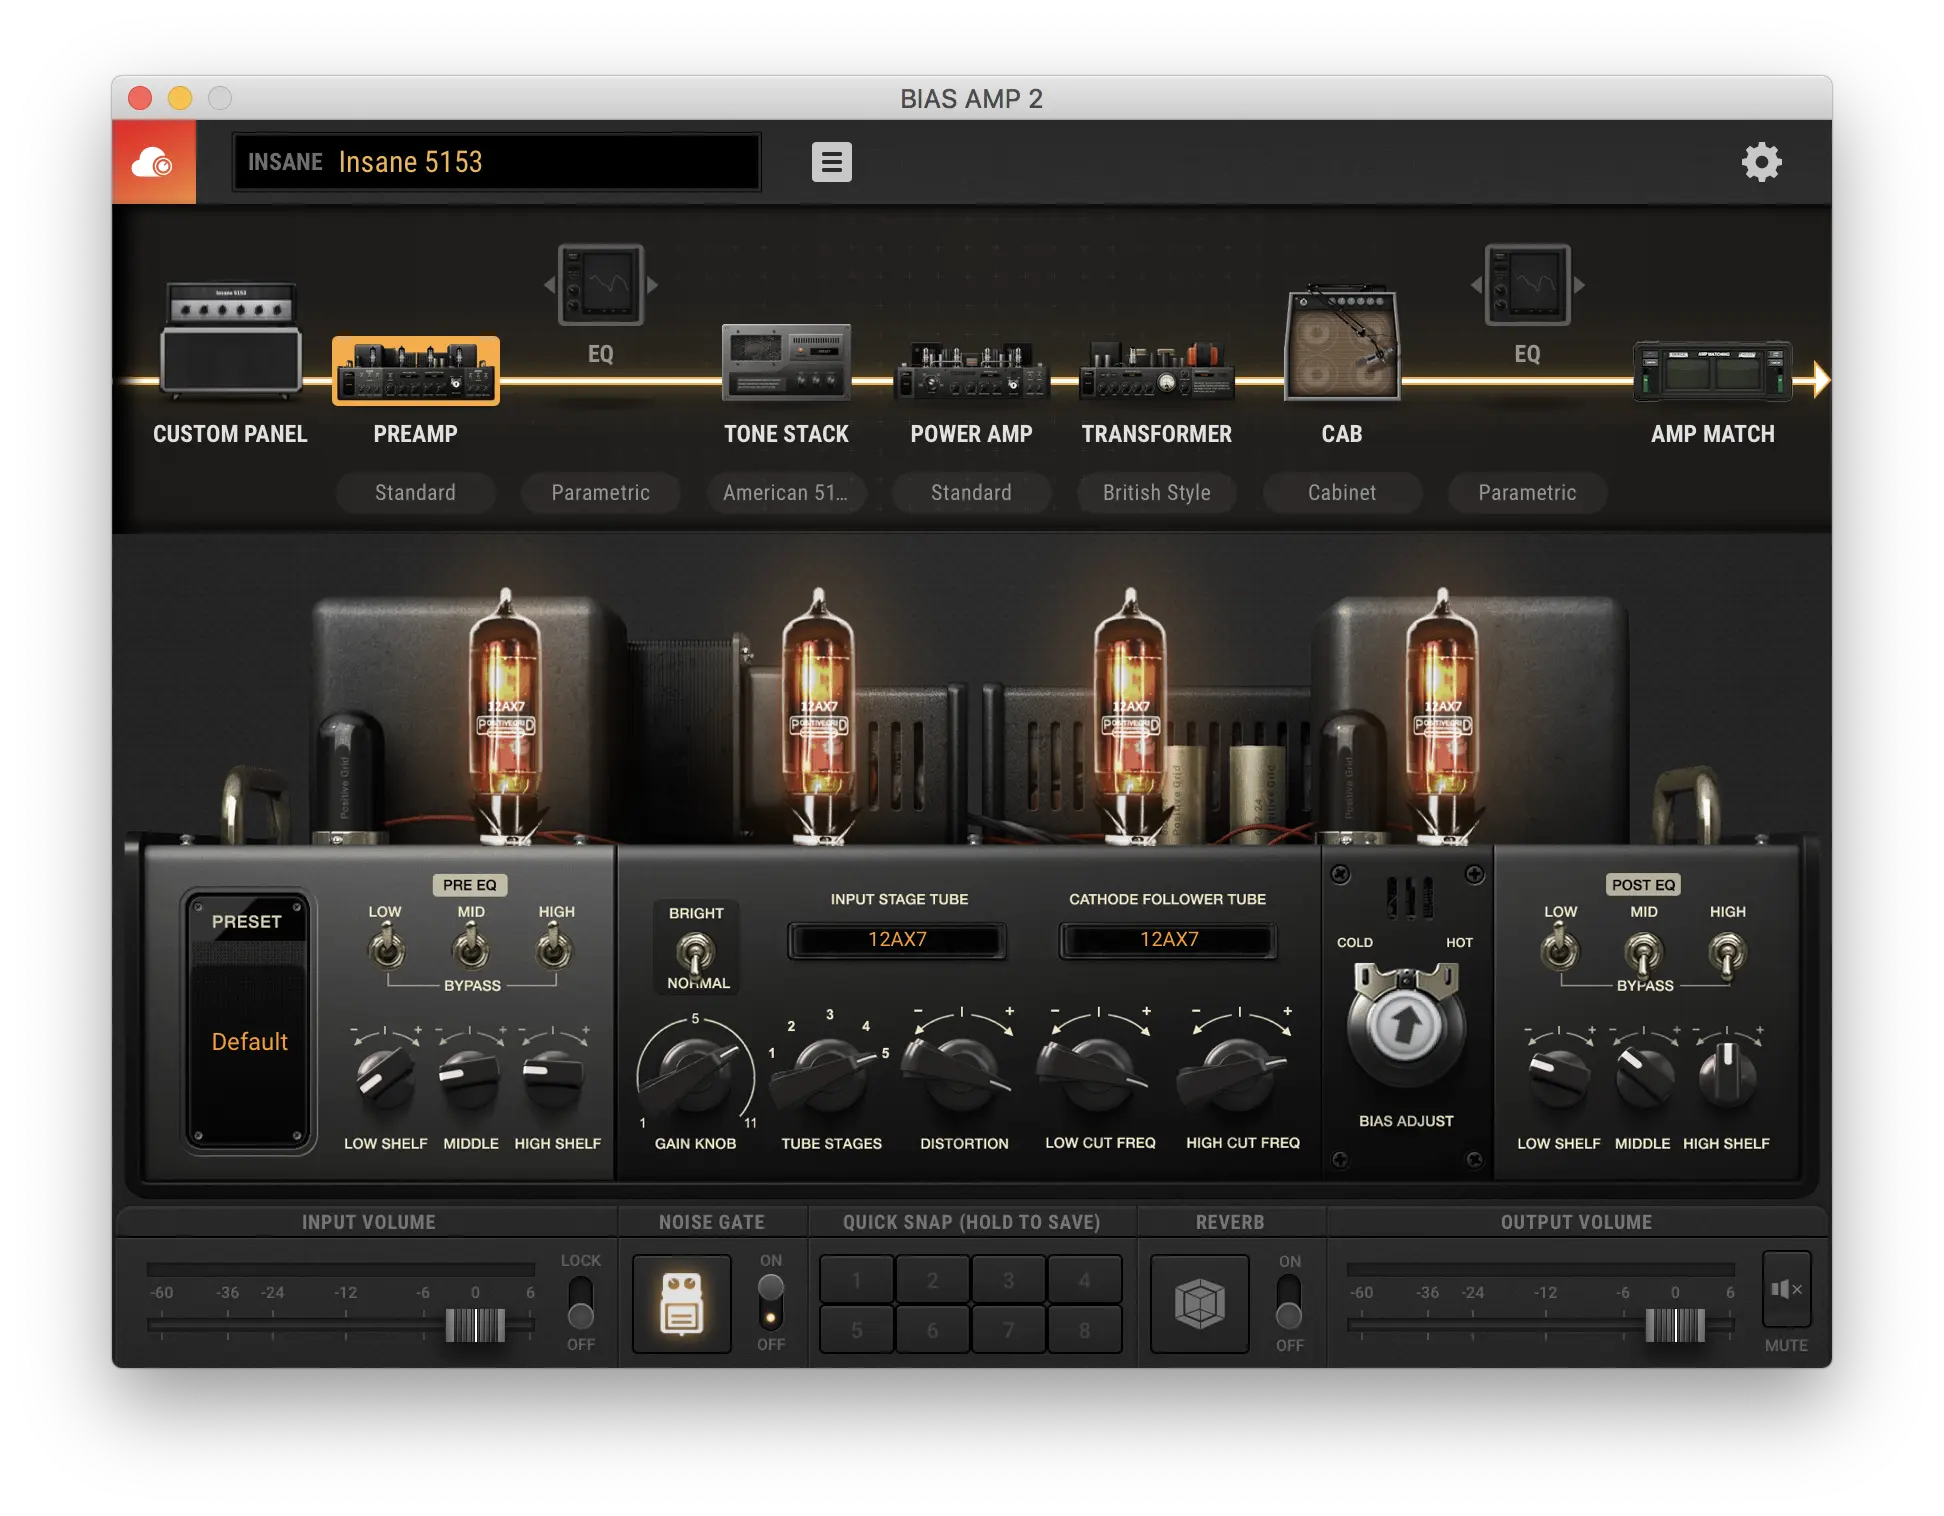
At some point i settled on Bias FX from Positive Grid, because its just does everything i need. I use it as standalone and in Logic Pro as a plugin and also on my iPad. I use Bias Amp 2 with gives even more option playing with the parameters in in your amp. You can basically change each aspect of your amp, like preamp tubes, power tubess, the transformer, voicing stack and finally your IR for cab simulation.
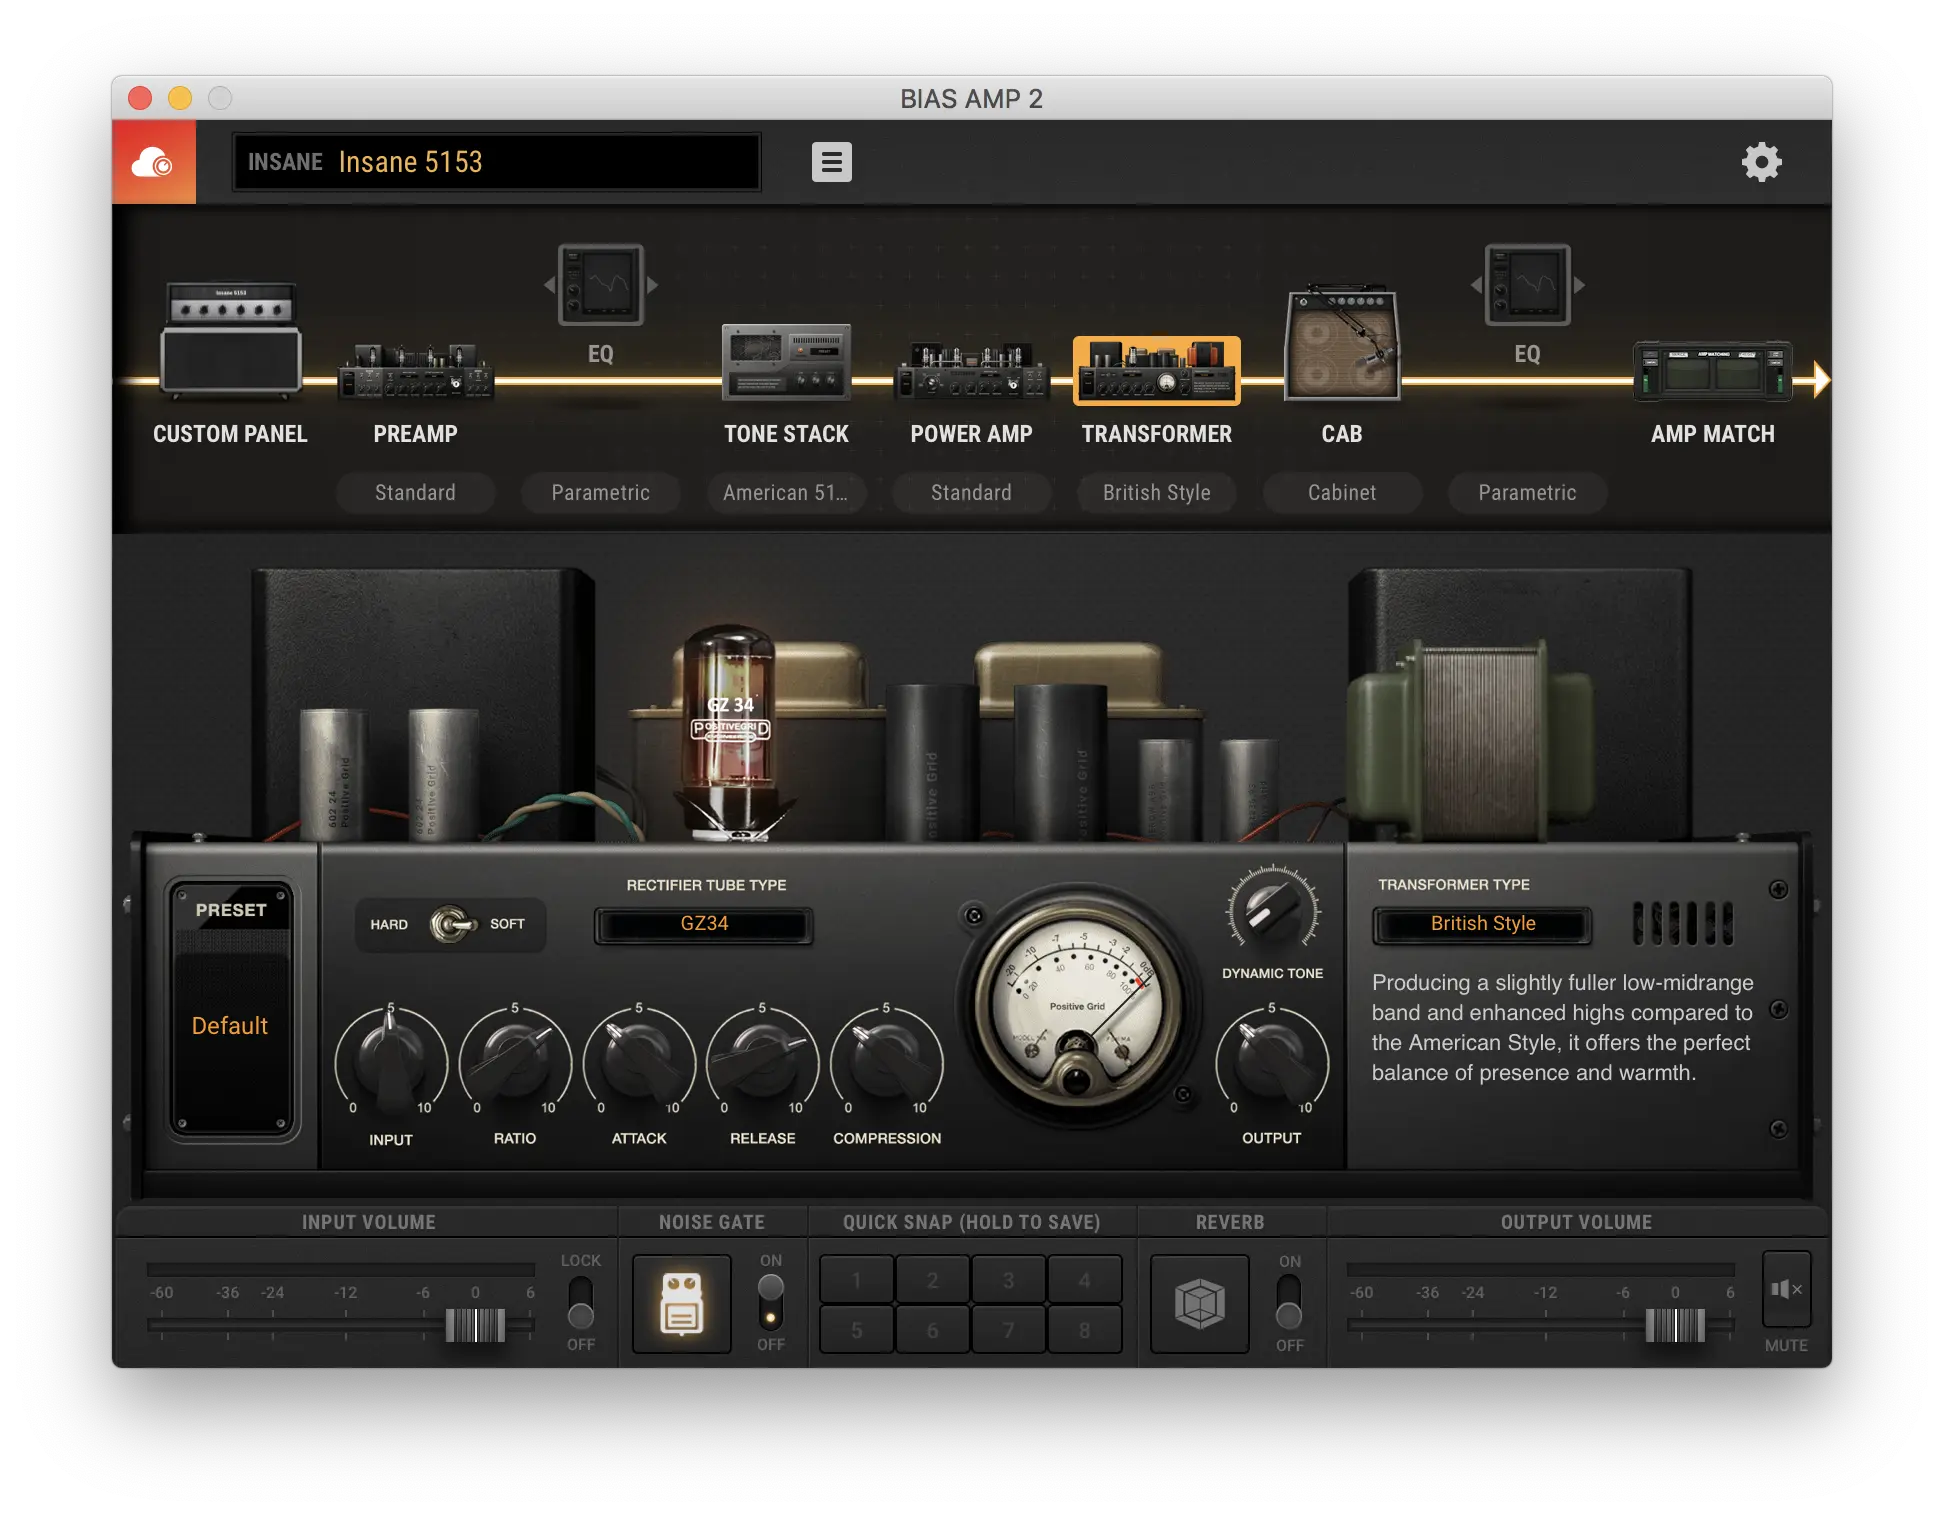
I sometimes get a bit frustrated with the code quality of Positive Grid products. The frontend parts tends to be a bit buggy, like crashes when you paste a password in Tone Cloud login screen, stupid stuff like this. The UI consistency between their products is not great either. But on the positive side, you can try out so many different tones in Bias FX, using different pedals, setup stereo stacks or play with IRs. So you can basically try out tones that usually not possible to achieve, because it not feasble to aquire so many different pedals and amps, to get that certain tone. You want to sound like Metalica on Ride the Lighting, just login to Tone Cloud where you can download all kinds of community driven tones, there you will find a preset.
What i dislike with, that i often feel interrupted from playing because i have to grab the mouse and tweak some settings or toggle a pedal. Not really a relaxed playing position while cramped in front of a computer. For me that stands a bit in the way of playing. I figured it would be nice to have a foot controller for my amp modeling setup. I knew Bias FX supports Midi, so i got into Midi controllers.
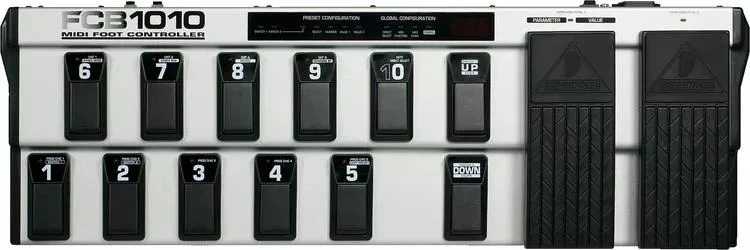
Behringer FCB1010
After some research i went with the Behringer FCB1010 and the UNO firmware, it seemed so have all the features i needed and looked highly customisable.
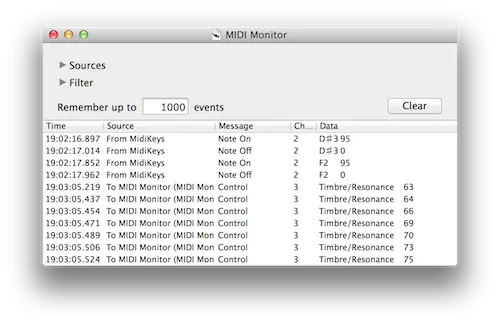
I tought i will spent just a couple of minutes to connect to my Audio Interface and setup some “midi commands” in Bias FX. Man was i wrong…It was not that easy. I had to get my hands dirty and understand Midi basics. I used the Midi Montor to see whats was going on the wire.
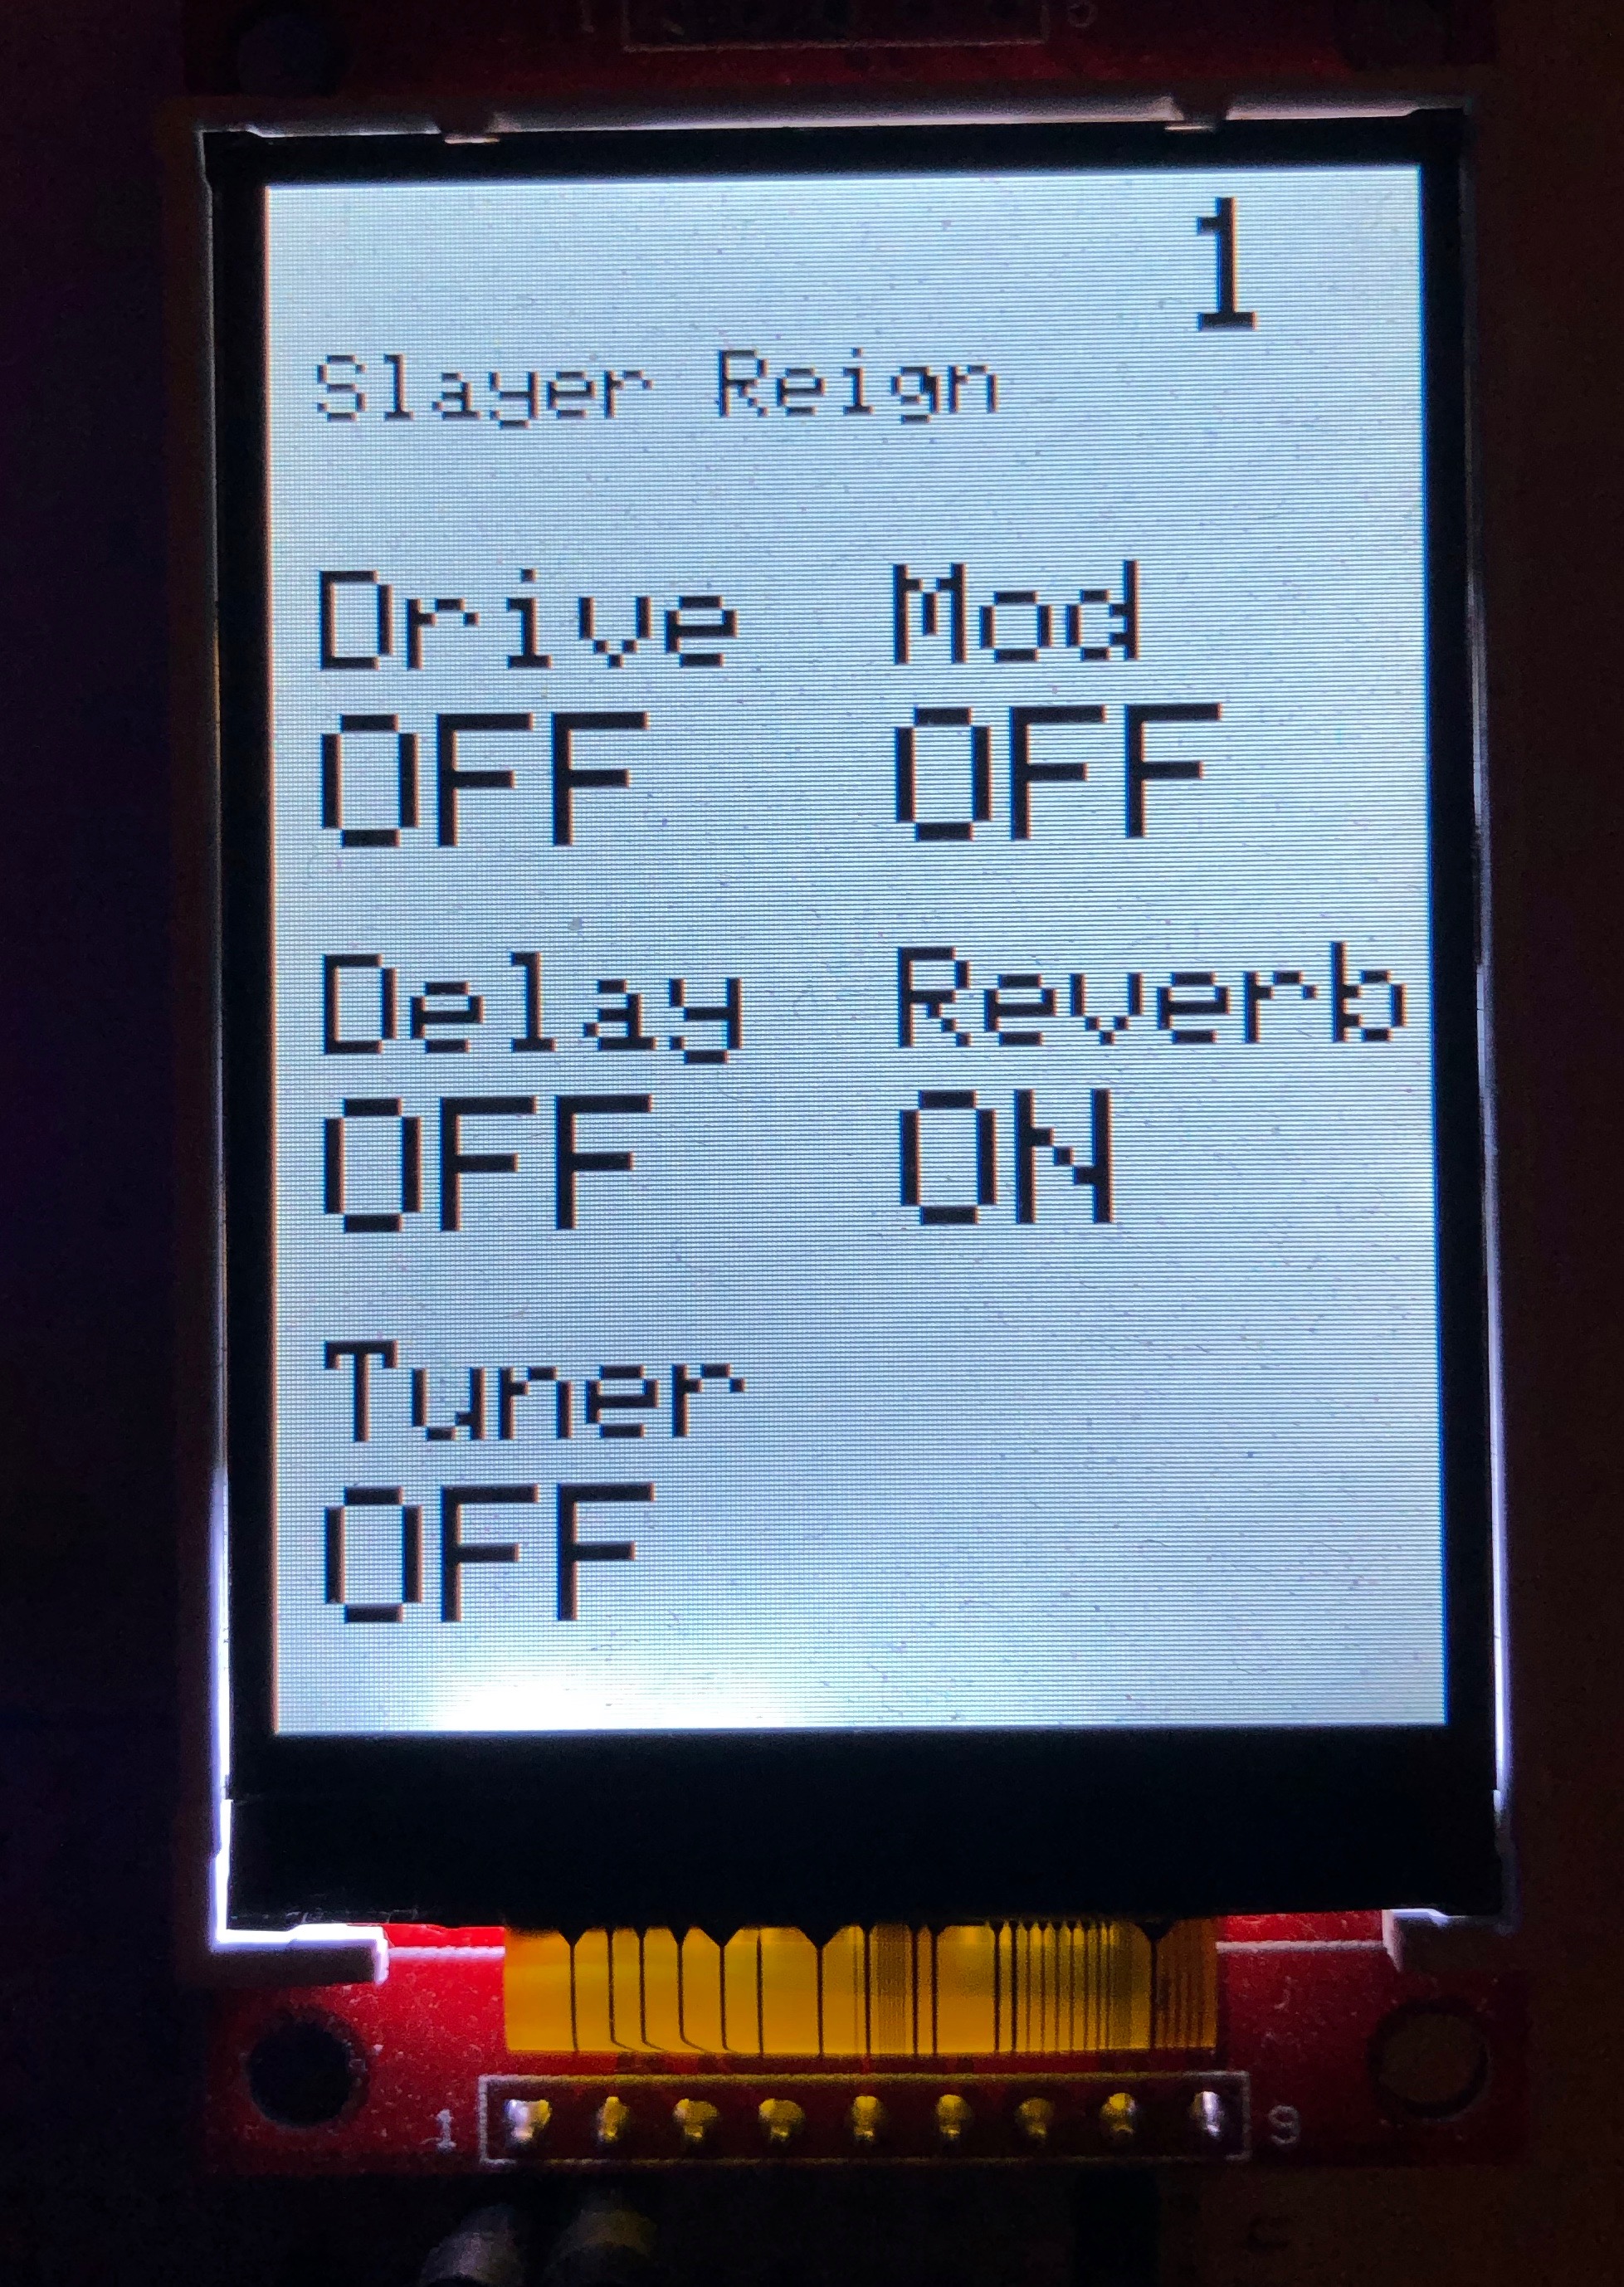
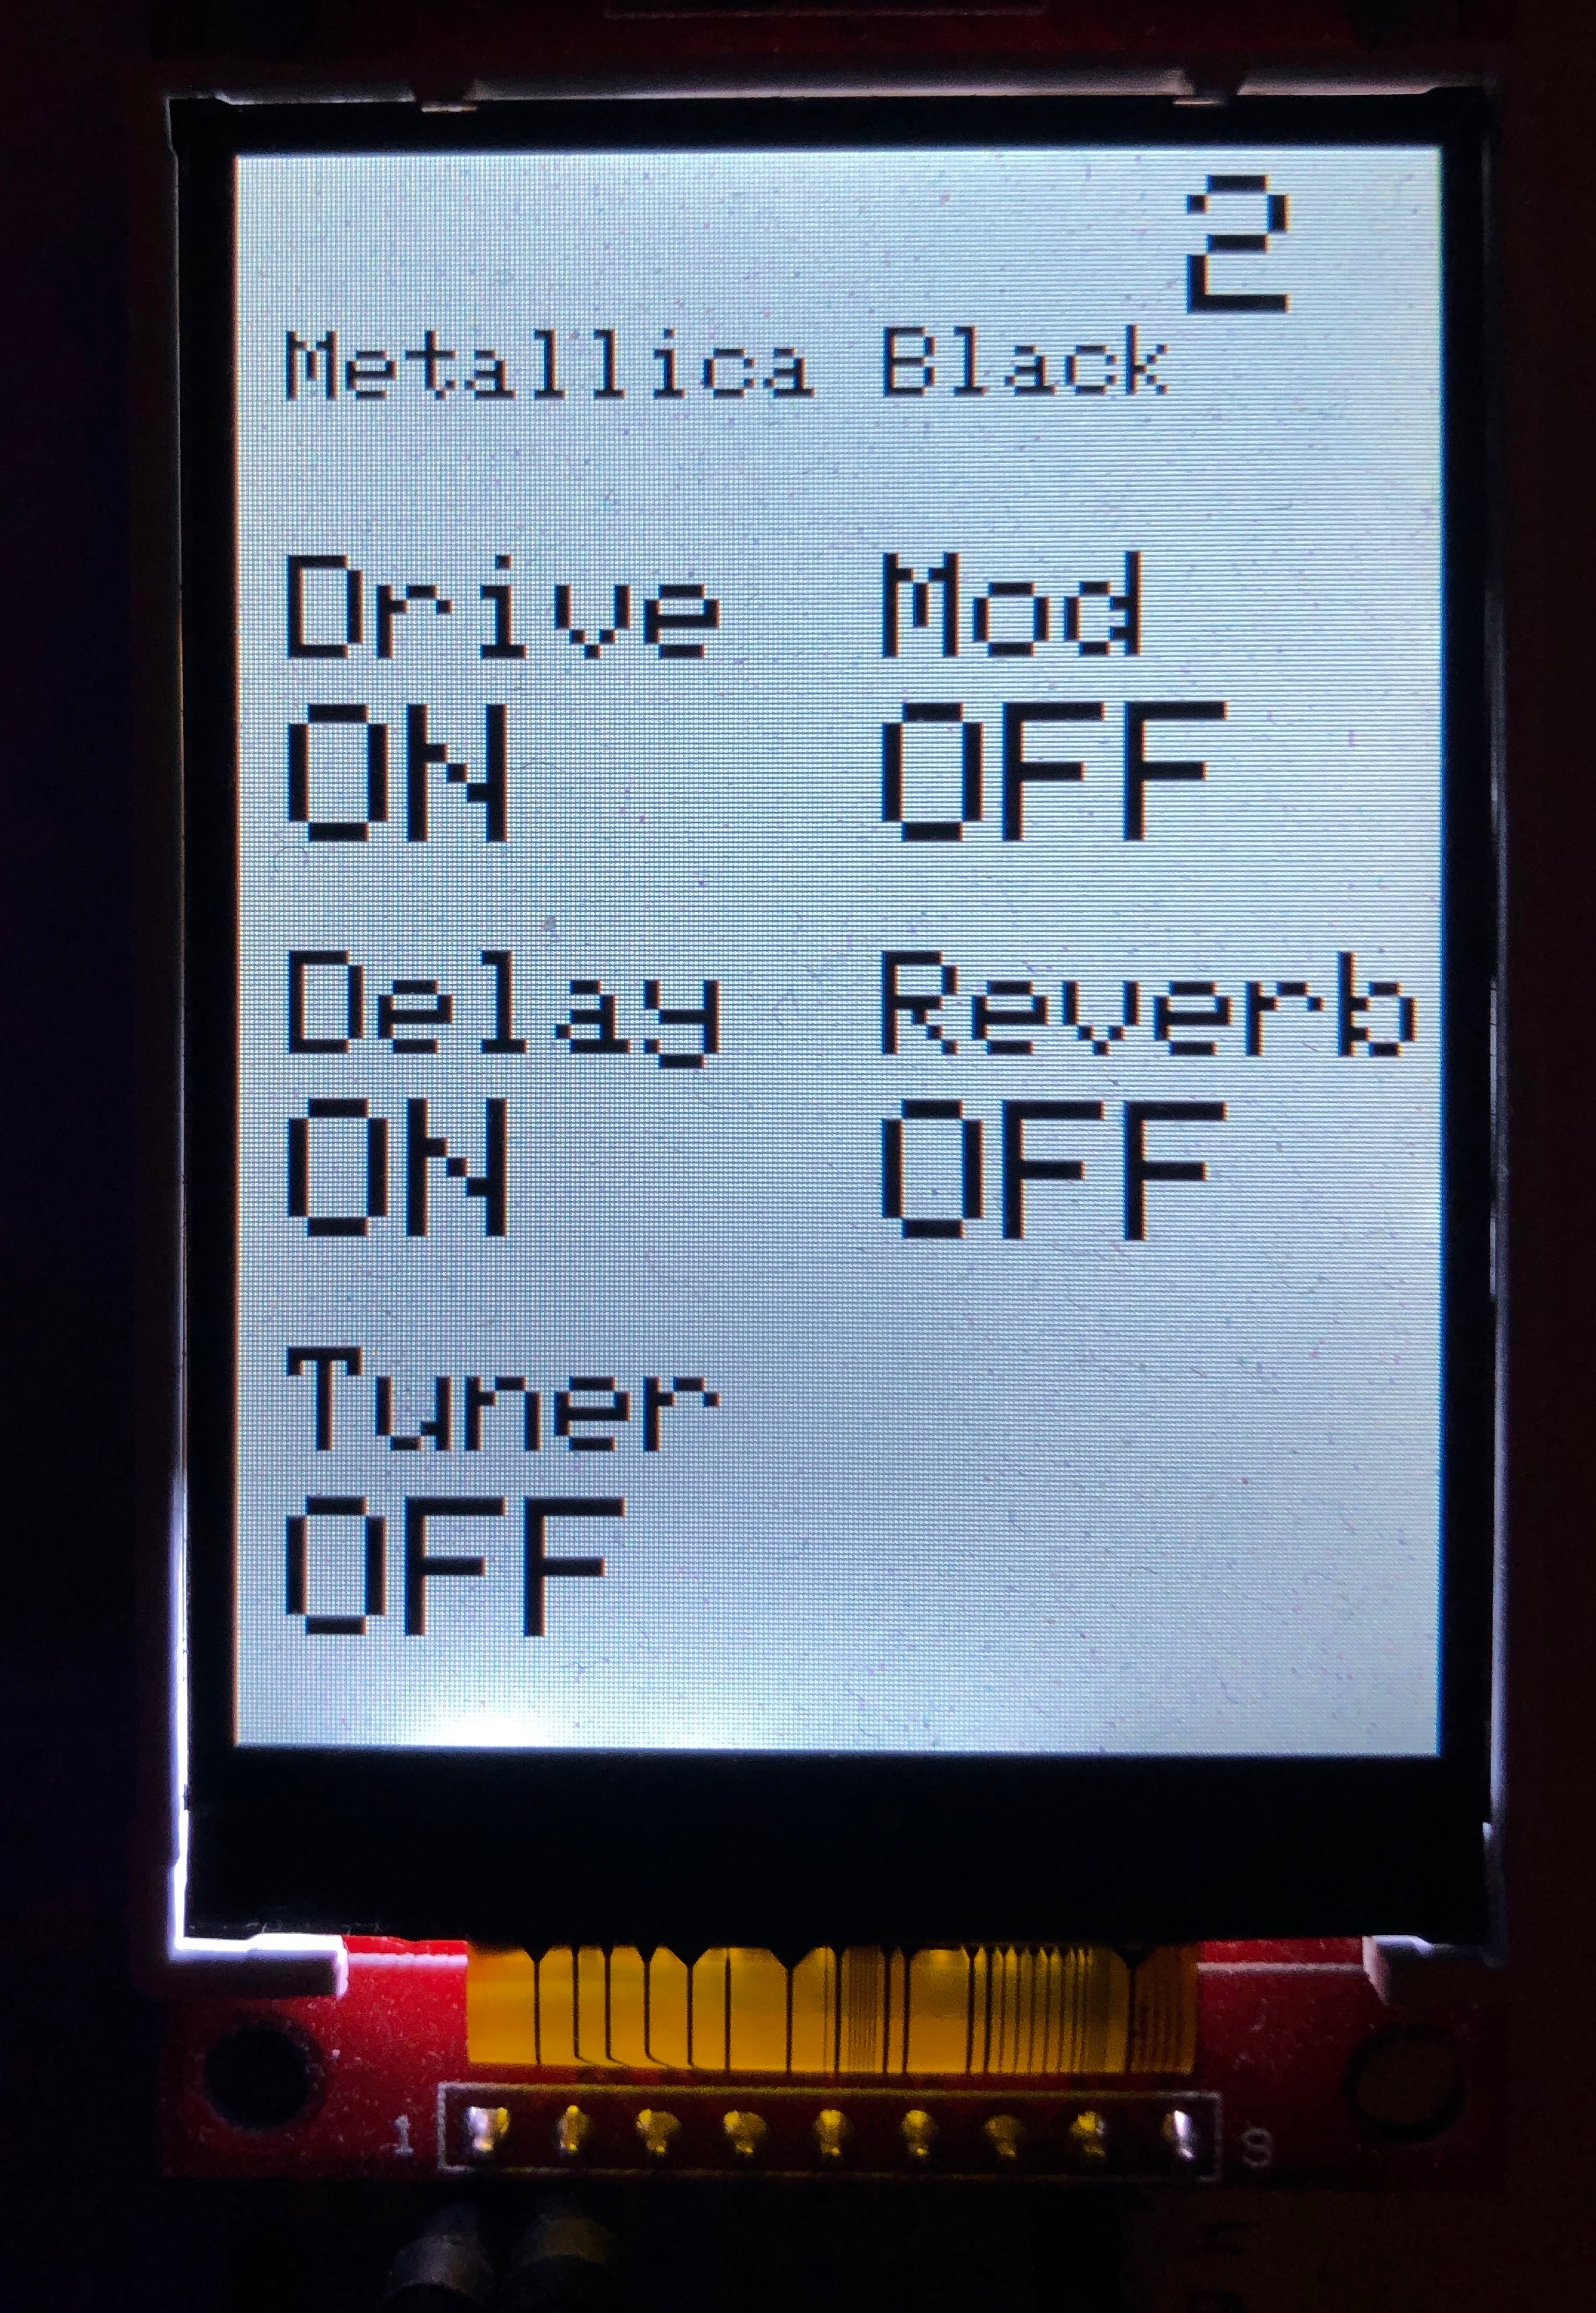
Since my footcontroller came with the UNO firmware, which support the concept of stompbox in patches i was looking into that feature to get it working with Bias FX. So the idea is to have 5 different patches on the lower switch row. Pressing switch 1 will trigger a patch change e.g. “Dist Rythm”. The foot controller sends a Progamm Change(PC) to Bias FX. Once the patch is active, you can control individual stompboxes within the patch, using the top row of switches. Pressing one of the top row switches will trigger a stompbox toggle by sending a Control Change Messages (CC) to Bias FX. Here is a example patch and stompbox config.
| Patch | Name | PC |
|---|---|---|
| 1 | Dist Rythm | 1 |
| 2 | Dist Lead | 2 |
| 3 | Clean Picking | 3 |
| 4 | Clean Chorus | 4 |
| 5 | Clean Lead | 5 |
| Stombox | Name | CC |
|---|---|---|
| 1 | Boost/Dist | 51 |
| 2 | Mod | 52 |
| 3 | Delay | 53 |
| 4 | Reverb | 54 |
| 5 | Misc | 55 |
So my plan was to configure 5-10 patches with 5 stompboxes each. I also wanted to add support for the expression paddles on thefoot controller. That i can map one CC for Wah-Wah and a volume pedal. And another CC for the pedal value.
Put the foot controller in programming mode, then you would be doing some crazy “River Dance” style pattern tapping on the switches to get all the patches setup. That was not my cup of tea, too lazy for that. Started to look for a desktops program that would assist me building the config for the foot controller.
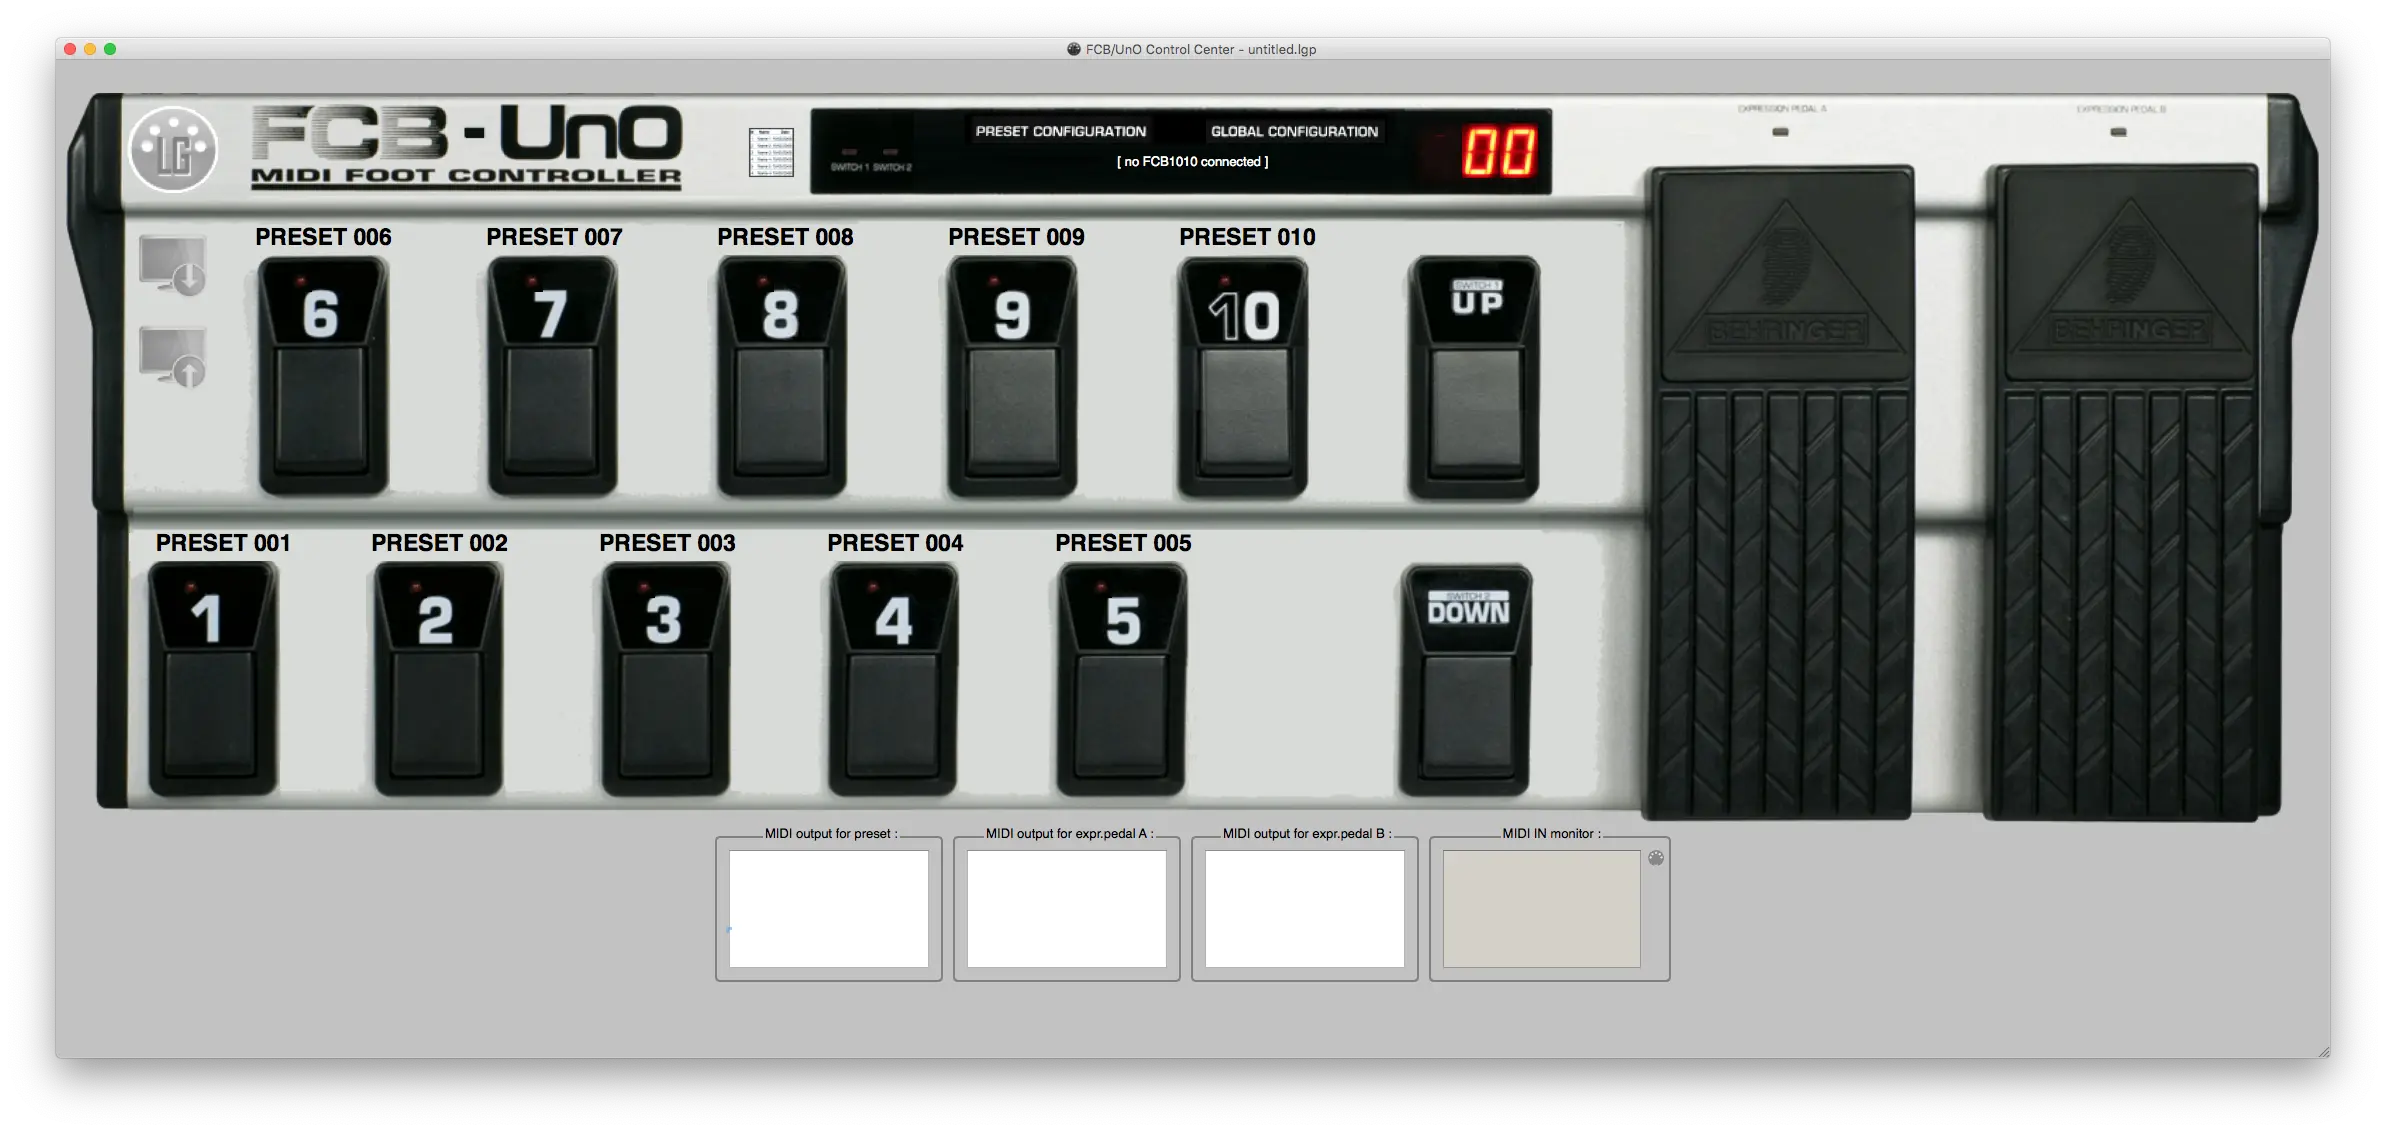
There is the offical FCB/UNO Control Center that work on OSX, but it was a bit glitchy and unmaintained, there is no 64bit build, which Mojave is starting to complain about. So i was not feeling confident spending 20 Euro on that.

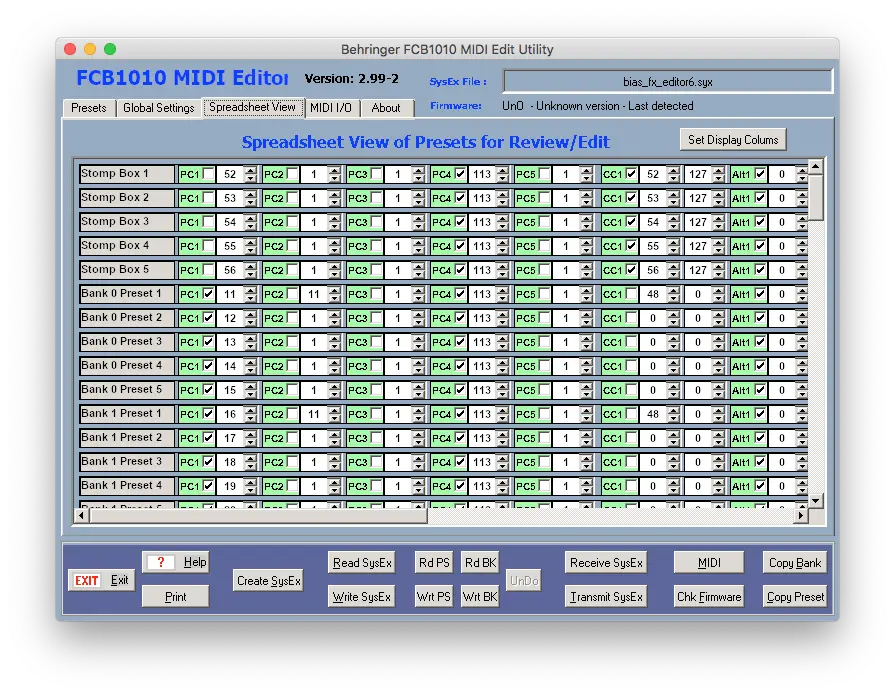
I ended up using the FCB1010 Midi Editor via Wine.There were some quirks, like that i was not able to persist certain CCs for specific switch, which i could work around. After spending a couple of hours and many config round trips sending SysEx i got the setup working with Bias FX.
But one thing wasn’t working. When selecting a patch, each stompbox would have an inital state. Like patch 1 has the distortion pedal and the delay pedal active, thus the status led of that switched would be on. Which also means that the foot controller send a PC 1 to switch the actual patch in Bias FX and CC 51 and CC 53 to enable the distortion pedal and the delay pedal. But thats not how Bias FX works, if you select that patch in Bias FX the stompboxes are active in the patch. So the footcontroller would actually do the opposite, it would disable the distortion and delay. I tried to mitigate the problem my changing the initial stompbox states in Bias FX, but that was not was i wanted, because i often select the patch via mouse input. It also didn’t work consistently due timing issues. So i needed a feature to enable a new patch that has certain stompboxes active but not triggering the stompboxes CC messages on inital select of that patch. The UNO firmware would not support such.
Time to build my own Midi Controller
I started looking around and found an Midi examples using an Ardunio. I was never a huge fan of Ardunio, didn’t like the IDE and that it tries to hide all technical details from you. But there a lot of easy accessable components and librarys, which will make the project a lot easier for me. I found this Arduino Makefile project, so i could go without the IDE.
Poc
- Ardunio Uno
- 0.96 inch I2C OLED display
- 4 Momentary Switches
- 4 Leds
I stared with getting a debug console running and then implemented some midi commands using the midi library. Conntected some the switches and status LEDs to the POC. Added a debounce switch lib to get the switches working properly. Now it was time to write the real program. I came up with a couple of C structs to hold all the patch meta data and states. Finally added a small OLED Display via I2C for status display which patch is active and with stompboxes are selected.
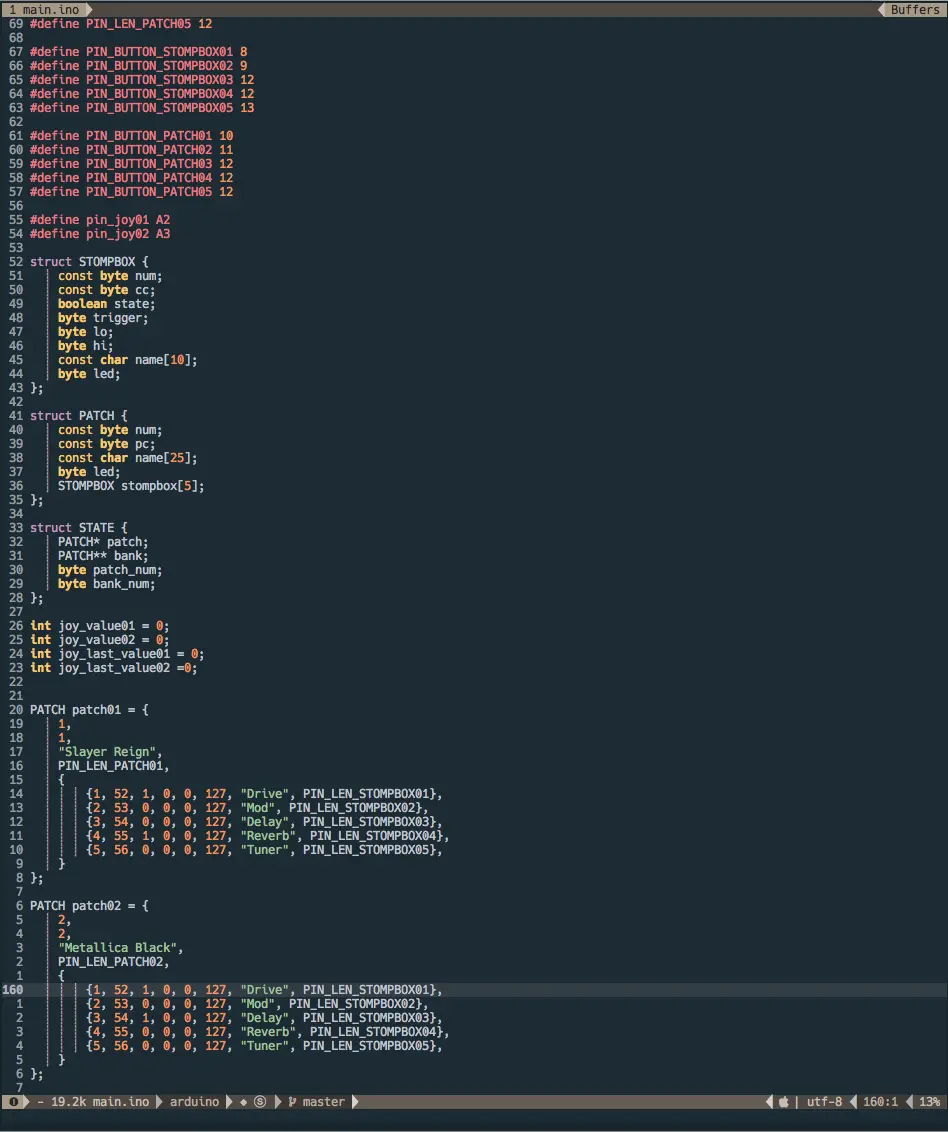
Soon i ran into hardware limits. I could only use half of OLED display because if was already out of SRAM on the AVR, and i could already see that i would run out of IO pins, too.
Ardunio Mega
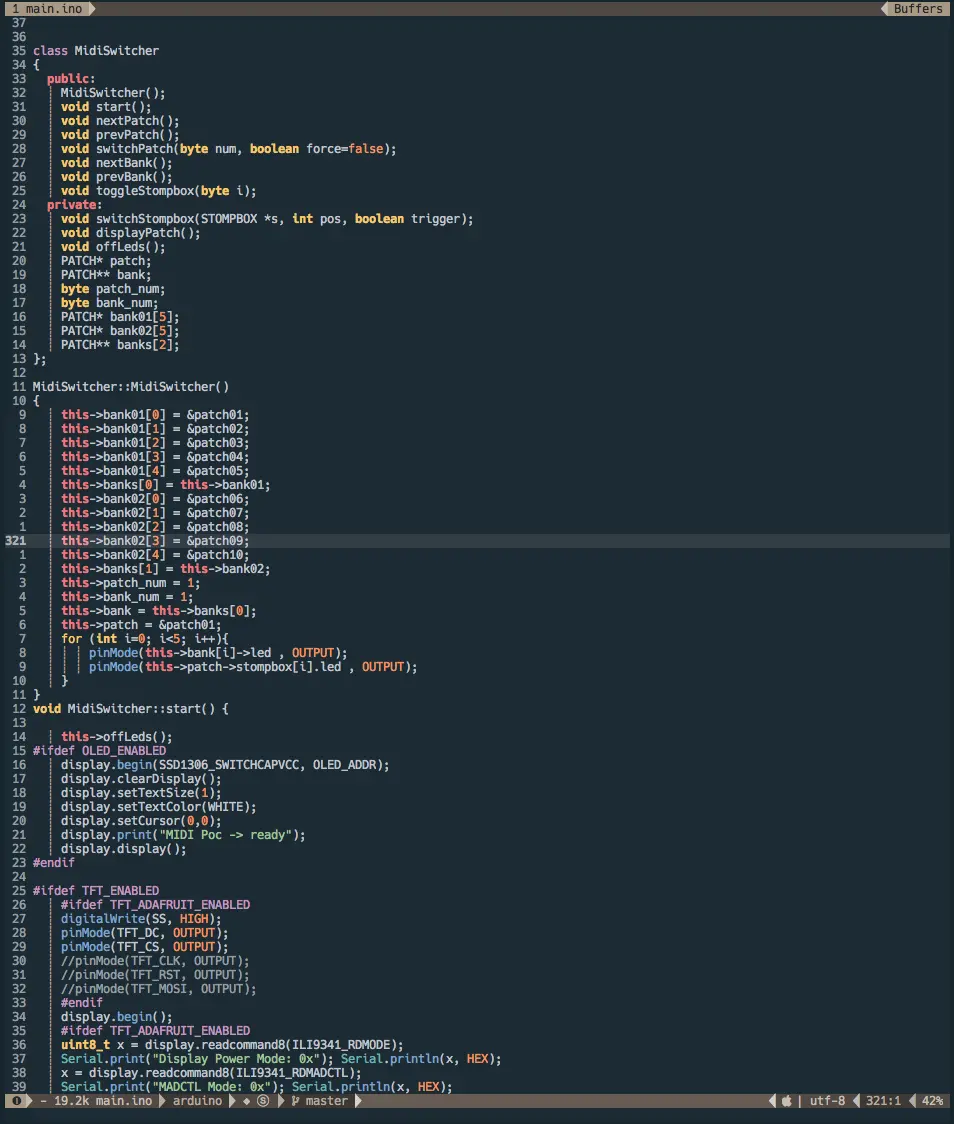
So i switched to Ardunio Mega and 2,2″ QVGA TFT LCD Display. After refactoring the hardware part of the software , i got the the new display working. Time to cleanup the code and throw most of the stuff into a C++ class. I was trying to convert all the config stucts to C++ classes, but then the dynamic character of C++ got into the way and was eating to much memory, so i stayed with the static c structs for the config.
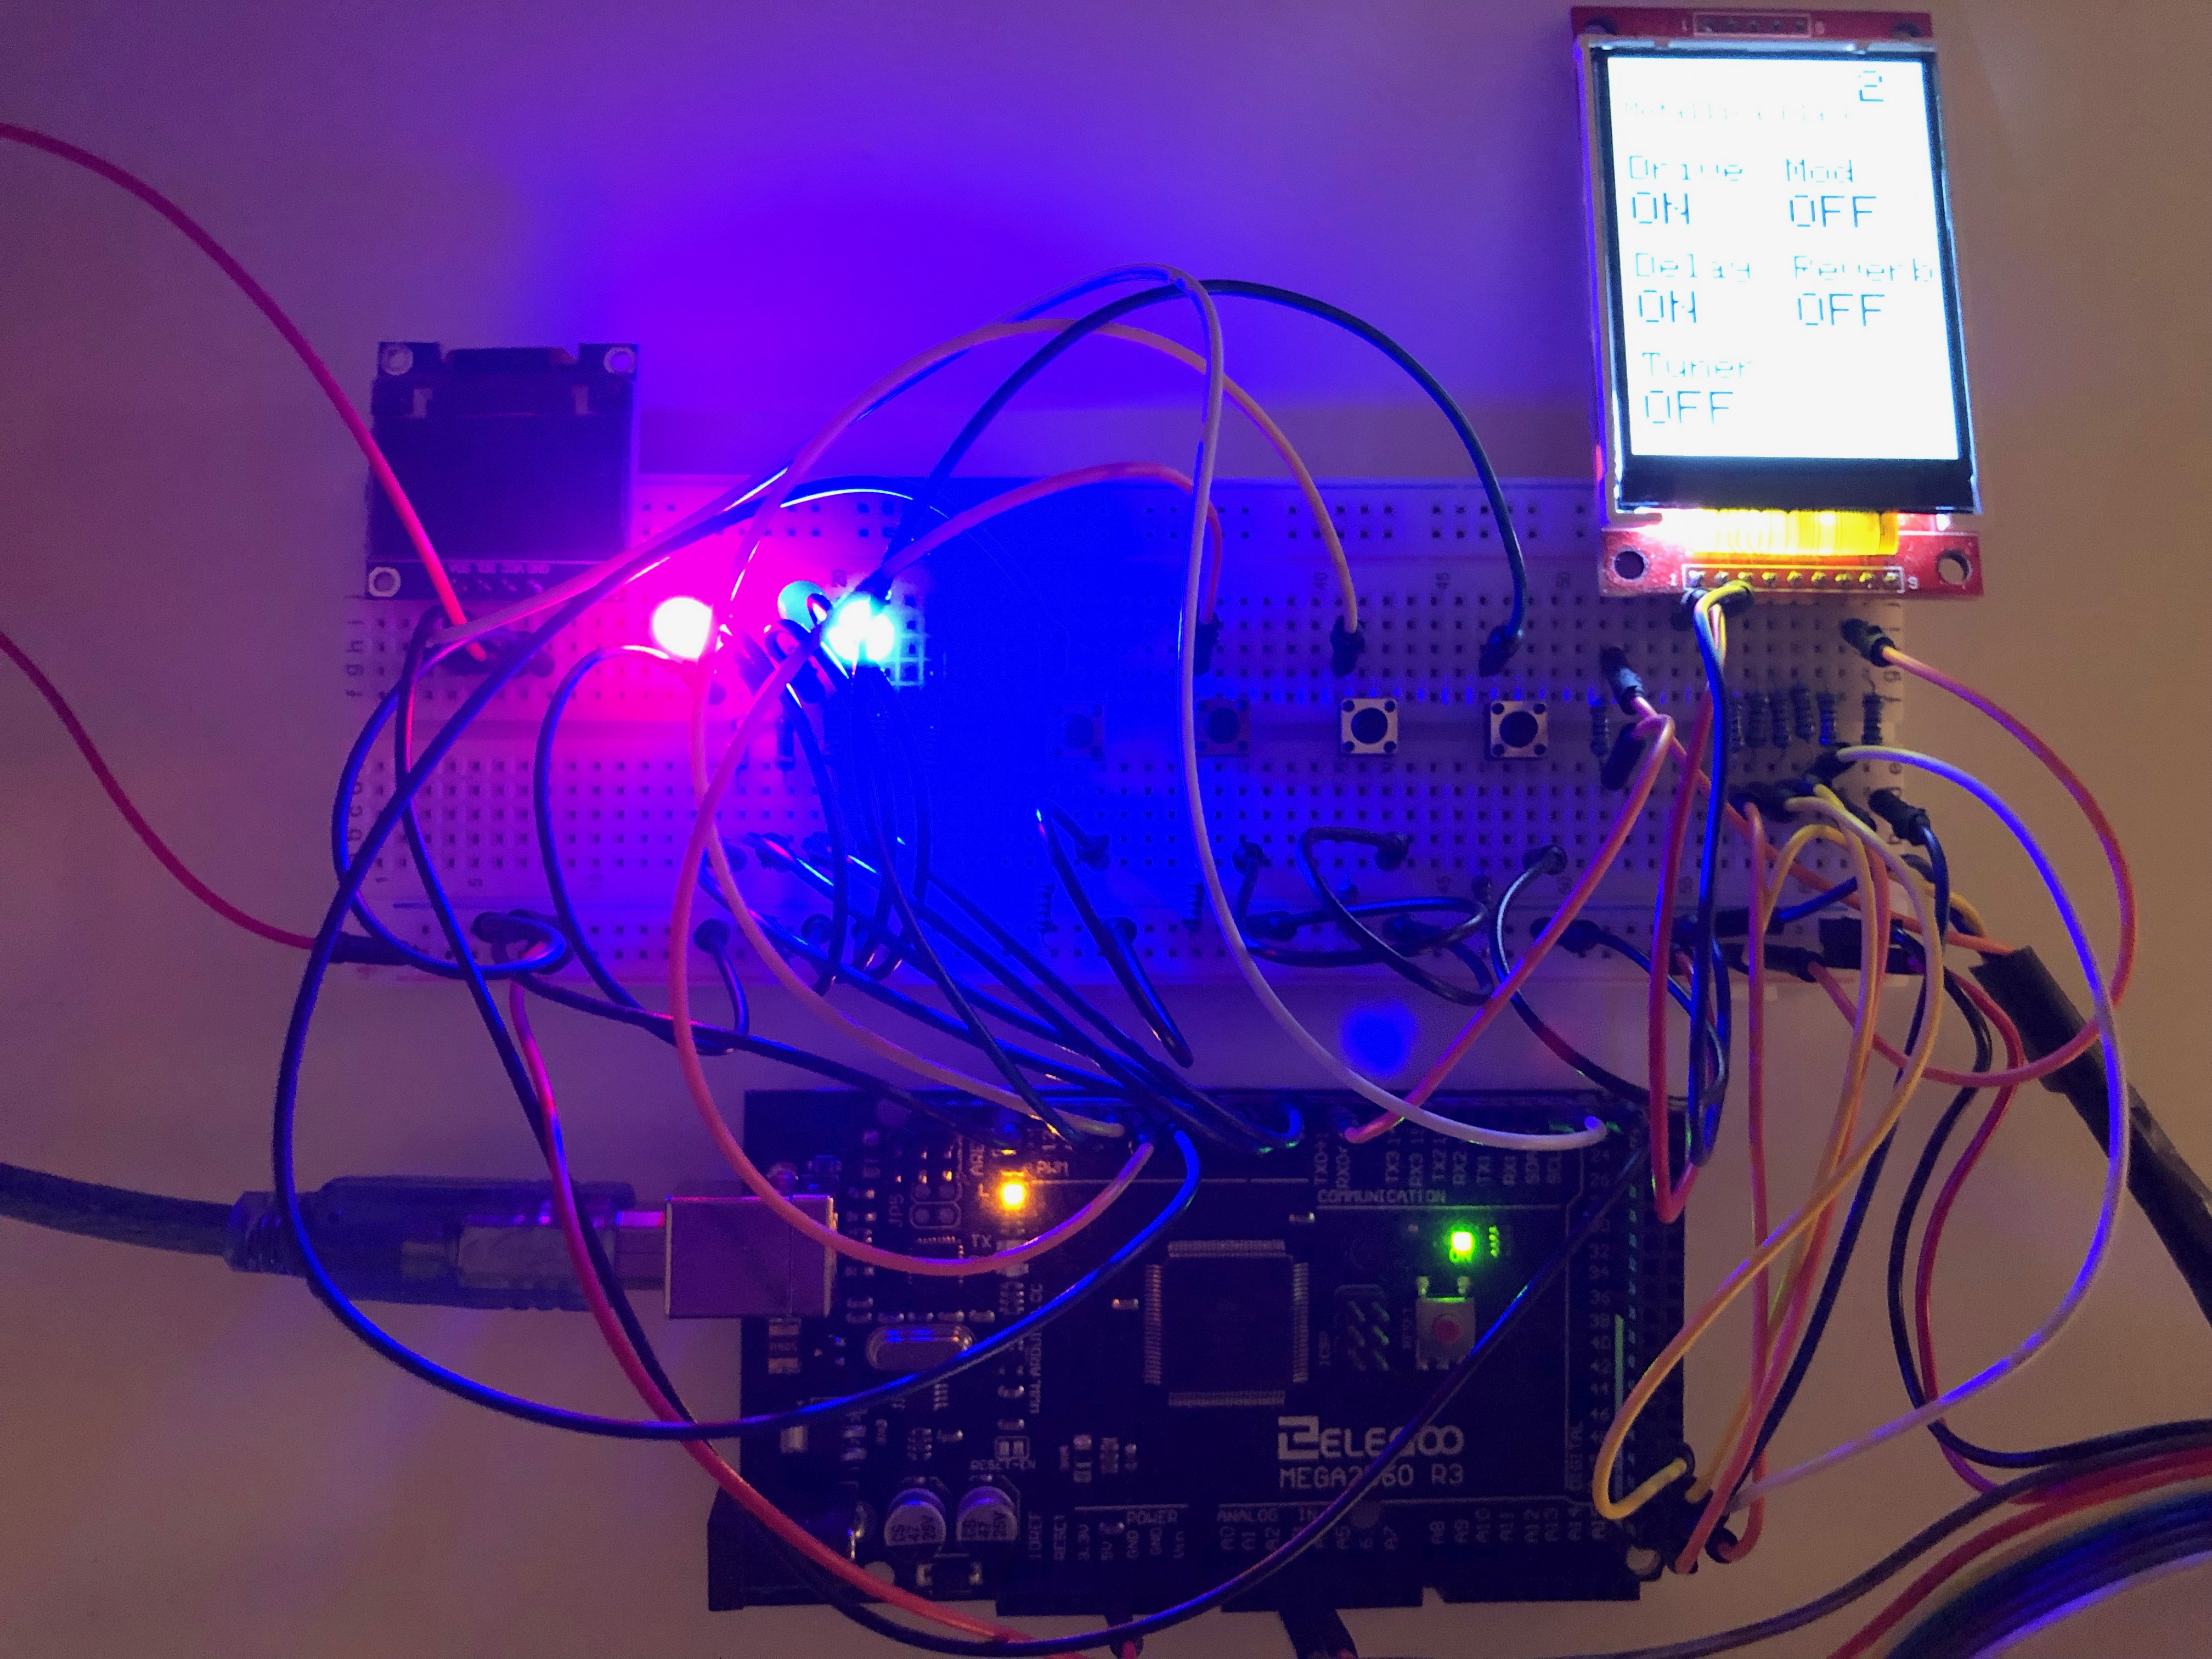
Downside was the TFT SPI display was a lot slower, too slow infact. Sure it has a lot more pixels to push, but still it was slow as a dog. Initial display code was a bit too simple.
- Clear the screen
- Render patch name and state
- Render all the stompbox names and states
First i tried a different display lib which seems to be faster than the Adafruit_ILI9341 lib. But even with the faster lib, my approach to rendering was not fast enough. So i moved away from full blanking and switched the display code to partials updates.
What now…
The POC phase of the project is done and now its time to build the complete pedal. I need to put everything in a nice case, add all the 10 Momentary Switches and 10 status LEDs. I don’t really need to make PCB, everything can be wired directly to the Ardunio board, there are just a couple of pull ups, that can directly go on the switches. I need to decided how i want to do external power, probably the easiest way to do it, it to give access to the USB port of the Ardunio thru the case and use external a USB power brick. The hardest part right now is to find a nice case for it.
To be continued…